Saturday, October 10, 2020

Rachel Vass Designs - Ruffled Iris

Happy Saturday!

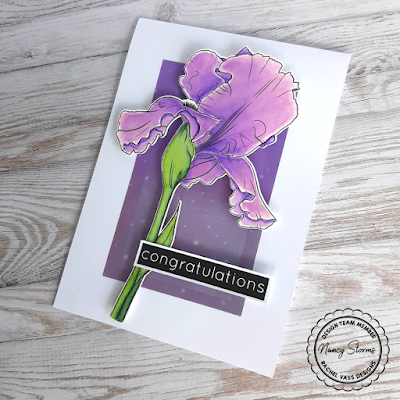
Today's card features the new Ruffled Iris digital stamp from Rachel Vass Designs.


I used my Silhouette Cameo to print and cut the iris and colored it wilh Zig markers.

On my card base I made a mask and did some ink blending with Dusty Concord and Wilted Violet Distress Oxide ink. But my mask was to small so I created a new and bigger one and blended the same Distress Oxide colors
again. It now looks like a border inside my mask and I actually like the effect. I also added some splatters with water to give this background some interest.

Finally I adhered the flower with foam tape for dimension and I also added the sentiment which is from Rachel's Summer Border digital set.


Rachel Vass Designs - Ruffled Iris

Rachel Vass Designs - Ruffled Iris

Rachel Vass Designs - Ruffled Iris


Supplies
- Rachel Vass Designs - Ruffled Iris
- Zig markers: 041, 044, 081, 083, 080
- Silhouette Cameo
- Distress Oxide ink:
          - Dusty Concord
          - Wilted Violet
- Rachel Vass Designs - Summer Border
- Foam tape

Tuesday, October 6, 2020

Missees by Karin Joan - Miss T.

Happy Tuesday!

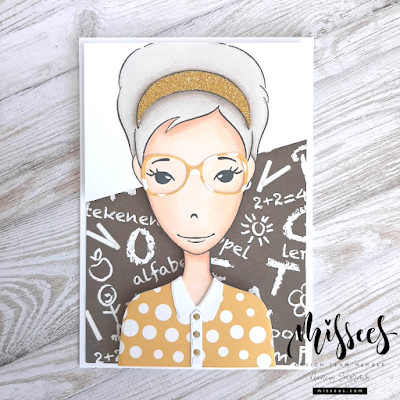
Here comes a new Missee, she may look a little strict,
she is honest, a bit nerdy, and difficult to predict.
She's focussed on the job and quiet about herself.
About her private life she's as MisTerious as an elf.
Despite this MisTery about whom she may be,
her name is without a doubt the MisTerious Miss T. 

Missees by Karin Joan

I first stamped the face and upper body with Melanie, which is the base set. I used Tatjana's hair but stamped it upside down to have a new haircut. By thinking outside the box I made even Karin Joan wonder how it was created ;-)
The eyes are from Betty and the mouth is from Tatjana.

Tip: The eyes are about the same height as the ears. You can align the stamp with the face. That should be the correct place to stamp the eyes.

Missees by Karin Joan

Then I colored the face and hair with Copic markers.

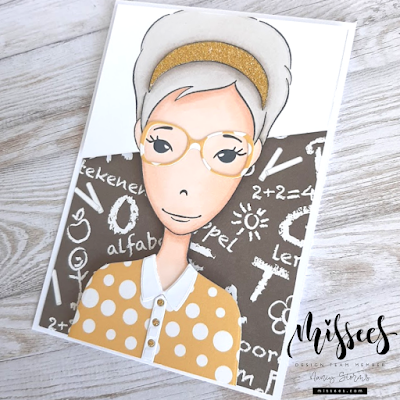
For the clothes I used the die from Betty and design paper from the Missees paper pad. I added golden buttons which were die cut from gold glitter paper. I used the same gold glitter paper for the hairband.
I also die cut the glasses from Carol from the same design paper as here clothes.

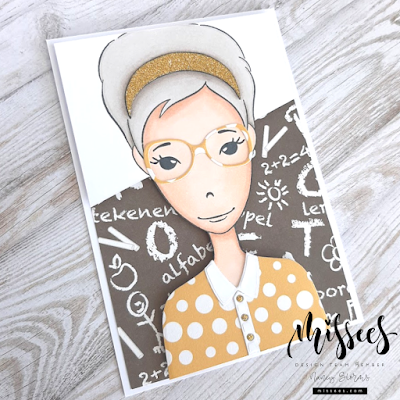
Next I partially cut out my Missee and adhered her to some blackboard design paper I found in my stash
with foam tape to create dimension.


Missees by Karin Joan

Missees by Karin Joan

Missees by Karin Joan

Missees by Karin Joan

Missees by Karin Joan


Supplies
- Missees - Melanie
- Missees - Tatjana
- Missees - Betty
- Missees - Carol
- Copic markers: E00, E11, E13, W1, W3, W5
- Missees Paper Pad
- Design paper from my stash
- Gold glitter paper
- Foam tape

Monday, October 5, 2020

AAA Birthday Challenge #18 - Photo Inspiration

Happy Monday!

Today a new challenge started over at AAA Birthday. This time it's a photo inspiration challenge.
There is so much to be inspired by and we are excited to see what you will create!


I first stamped the flowers with different Altenew ink colors and cut them out by hand. I did the same with the leaves.

For the background I was inspired by the woven basket so I used the Next Level Woven embossing folder.
On top of this I adhered a piece of cardstock which I stamped with the Nifty Plaid stamp from Papertrey Ink.

Finally I adhered the flowers and leaves with foam tape for dimension and stamped the sentiment from Impression Obsession with Versafine Onyx Black.

Altenew Flowering Cistus


Altenew Flowering Cistus

 
Altenew Flowering Cistus


Check out how the amazing AAA Birthday team was inspired this month.


Supplies
- Altenew - Flowering Cistus
- Altenew ink:
          - Puffy Heart
          - Rubellite
          - Purple Wine
          - Razzleberry
          - Maple Yellow
          - Dark Chocolate
          - Firefly
          - Grass Field
          - Shadow Creek
- Next Level Woven embossing Folder
- Papertrey Ink - Nifty Plaid
- Impression Obsession - Celebrate You
- Versafine Onyx Black
- Foam tape

Saturday, October 3, 2020

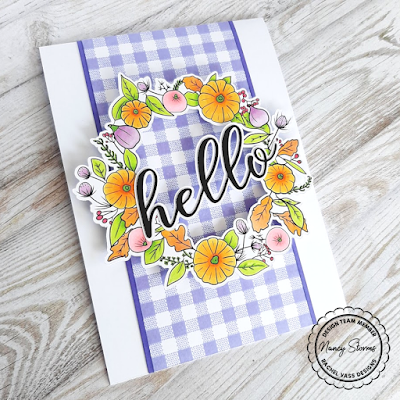
Rachel Vass Designs - Fig and Pumpkin Wreath

Happy Saturday!

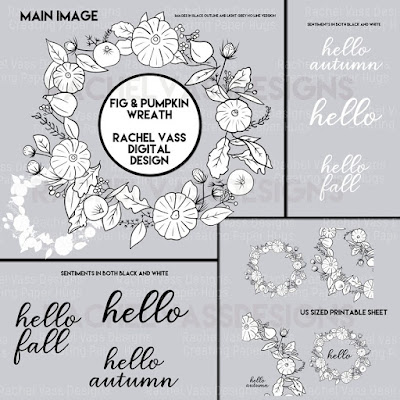
Say hello to a new release from Rachel Vass Designs: Fig and Pumpkin Wreath.

Rachel Vass Designs - Fig and Pumpkin Wreath


I used the print and cut function with my Silhouette Cameo for my card.
When the wreath and sentiment were cut, I colored the wreath with Copic markers.

Then I masked off the edges of my card and stamped the Gingham background with Hydrangea Altenew ink. I also adhered 2 small strips which were colored with Ultraviolet Altenew ink.

Finally I adhered the wreath and sentiment with foam tape to create some dimension.

Don't forget to head over to Rachel's blog for more inspiration.


Rachel Vass Designs - Fig and Pumpkin Wreath

Rachel Vass Designs - Fig and Pumpkin Wreath

Rachel Vass Designs - Fig and Pumpkin Wreath


Supplies
- Rachel Vass Designs - Fig and Pumpkin Wreath
- Copic markers: RV25, V000,V01, V12, RV21, RV23, RV13, Y35, Y38, YR18, YR12, E97, YG01, YG13, YG25, YG17
- Impression Obsession - Gingham
- Altenew ink:
          - Hydrangea
          - Ultraviolet
- Foam tape
- Silhouette Cameo

Tuesday, September 29, 2020

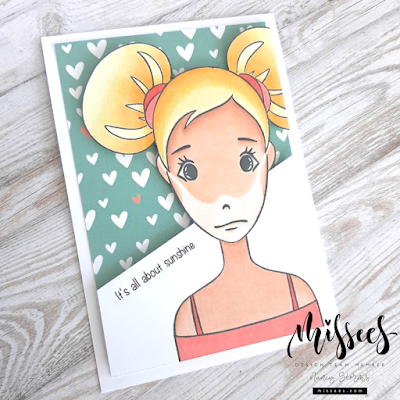
Missees by Karin Joan - Tanny

Hi crafty friends,

This newest Missee lives for only one thing,
she loves sunbathing above anything.
With her skin lightbrown kissed by the sun,
she works her tan just for fun.
Covid-19 couldn't stop her for getting some color,
watch-out 'Tanny', don't forget your mouth-cover.


Missees by Karin Joan - Tanny

 
I first stamped the face and upper body with Melanie, which is the base stamp set. For the hair I used Miranda.
For the eyes and mouth I used Tasha.
The clothes are from Tatjana.

When all was stamped I drew a pencil line for her mouth mask. I colored her with Copic markers, leaving the area of her mouth mask lighter. Then I errased the pencil line.

Missees by Karin Joan - Tanny

Next I partially cut her out.
I used a patterned paper from the Missees paper pad and adhered this to the card base. Next I adhered Tanny to the card with foam tape to create some dimension.

Finally I printed the sentiment (font: KBWritersBlock) and adhered this to the card.

Missees by Karin Joan - Tanny

Missees by Karin Joan - Tanny


Supplies
- Melanie
- Miranda
- Tasha
- Tatjana
- Memento Tuxedo Black ink
- Copic markers: E000, E00, E11, E13, Y00, Y11, Y21, Y35, Y26, R22, R24
- Missees Paper Pad
- Foam tape

Monday, September 28, 2020

Missees by Karin Joan - Kim Mono

Hi all!

This newest character is a girl that serves.
While serving, she dreams about the Samurai she deserves.
A wonderful teahouse, with a lake full of kois.
A beautiful Feng Shui garden and kids with many toys.
What would this Geisha's name be?
Kim Mono is the name of this Missee.


For this Missee I used Betty, which is the base set, to cut out the head and body.
As it also cuts out the ears, I adhered them at the back with tape.

Next I stamped the eyes from Carol with Versafine Onyx Black ink. The mouth is also from Carol and is stamped with Memento Love Letter ink.

Tip: The eyes are about the same height as the ears. You can align the stamp with the face. That should be the correct place to stamp the eyes.


Then I used Betty again to cut out her clothes. I stamped some leaves from Carol with Versamark and heat set them with Gold embossing powder. I then colored the kimono with Barn Door distress oxide ink. I did the same with the hairband. The hair is from Tasha.


For the kimono I also used the curved die from Betty to create a golden edge. For the golden collar I used a Versamarker and heat embossed this with gold embossing powder.


When this Missee was finished I stamped the background from Ellen Hutson with Versafine Onyx Black ink and adhered the Missee with foam tape to create some dimension.


Supplies
- Missees - Betty
- Missees - Carol
- Missees - Tasha
- Versafine Onyx Black
- Love Letter Memento ink
- Versamark
- Gold embossing powder
- Barn Door Distress Oxide ink
- Ellen Hutson - Mondo Sakura
- Foam tape

Saturday, September 26, 2020

Rachel Vass Designs - Cup Of Joe

Happy Saturday!

Rachel Vass has got another beautiful digi stamp release for you today! It's called Cup Of Joe.


I used the print and cut function in my Silhouette Studio to print and cut the image. Then I colored it with Copic markers.

For the background I used the Watercolor Frames from Altenew and stamped the circle several times with
Dark Chocolate Altenew ink.

Finally I adhered the cup with the flowers with foam tape for dimension.


Rachel Vass Designs - Cup Of Joe

Rachel Vass Designs - Cup Of Joe

Rachel Vass Designs - Cup Of Joe


Supplies
- Rachel Vass Designs - Cup Of Joe
- Altenew - Watercolor Frames
- Dark Chocolate Altenew ink
- Copic markers: E11, E13, E23, E57, W1, Y13, Y06, Y08, YG13, YG25, YG17, B93, B95
- Silhouette Cameo
- Foam tape