Wednesday, April 28, 2021

Altenew April 2021 Inspiration Challenge

Hi crafty friends!

Today I'm sharing a card featuring Altenew's Wild Hibiscus stamp set.
The colors are inspired by the April challenge from Altenew.

I first stamped the flowers with Memento Tuxedo Black ink and used the coordinating dies to cut them out. Next I colored them with Copic markers.

Then I stamped the splatters from MFT as a background by using
Lavender Field Altenew ink.

Finally I stamped the sentiment from Altenew's Label Love set with Altenew Obsidian Black pigment ink and adhered everything with foam tape to create some dimension.

Altenew - Wild Hibiscus

Altenew - Wild Hibiscus

Altenew - Wild Hibiscus


I want to share my card at:

- Altenew April 2021 Inspiration Challenge


Supplies
- Altenew -  Wild Hibiscus
- Memento Tuxedo Black
- Copic markers: B000, V01, V12, V15, V17, YG25, YG17
- MFT - Distressed Patterns
- Lavender Fields Altenew ink
- Altenew - Label Love
- Altenew Obsisdian Pigment ink
- Foam Tape

Saturday, April 24, 2021

Enjoy Your Day

Happy Saturday!

I made this slimline card based on the sketch from FMS#482.

I stamped the background from Uniko with Versafine Onyx Black.

Next I stamped the flower and leaves from SSS with Memento Tuxedo Black and used the coordinating dies to cut them out. I used Copic markers to color them and used foam tape to adhere them to the card base.

Finally I stamped the sentiment from Impression Obsession with Versafine Onyx Black.

SSS - Look For The Rainbows

SSS - Look For The Rainbows


I want to share my card at:

- Freshly Made Sketches #482


Supplies
- SSS - Look For The Rainbows
- Memento Tuxedo Black
- Uniko - Background Builders: Delightful Diamonds
- Versafine Onyx Black
- Impression Obsession - Enjoy Your Day
- Copic markers: YG01, YG25, Y35, Y26, RV21, RV13, RV14

Wednesday, April 21, 2021

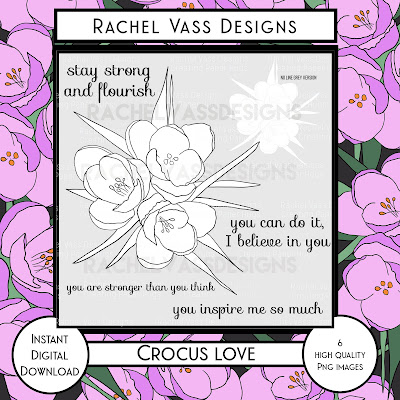
Rachel Vass Designs - Crocus Love

Hello crafty friends!

Today I am sharing a card featuring the Crocus Love digital stamp from Rachel Vass Designs.

Rachel Vass Designs - Crocus Love


I first used the print and cut function in my Silhouette Studio and colored the flowers with Copic makers.

I printed the sentiment on a piece of cardstock and used a stitched rectangle die to cut it out and matted this.
I did the same with the bigger rectangle but here I added some small purple strokes in the middle. Then I adhered the front panel with foam tape to create some dimension and I also used foam tape to adhere the flowers to the card.
As a finishing touch I added some small gem stones.

Rachel Vass Designs - Crocus Love

Rachel Vass Designs - Crocus Love

Rachel Vass Designs - Crocus Love


Supplies
- Rachel Vass Designs - Crocus Love
- Silhouette Cameo
- Stitched Rectangle die
- Copic markers: YG03, YG25, YG17, YG67, V01, V12, V15, V17
- Foam tape
- Gem stones

Tuesday, April 20, 2021

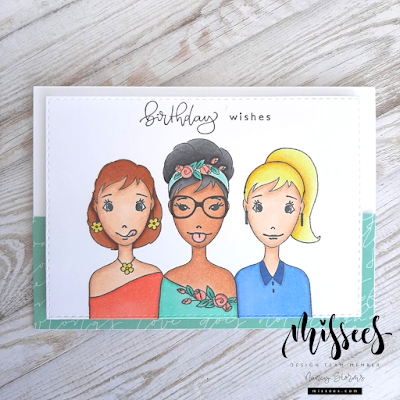
Missees By Karin Joan - Birthday Wishes

Hi all!

For this card I wanted to stamp 3 Missees next to each other so I first made a mask by stamping 1 Missee (STAMPKJ15) and cut it out by hand.

I then stamped the Missee in the middle onto a piece of cardstock and added the mask on top of it. Then I stamped the right and the left Missee so the lines of their body are only stamped on the mask.

Missees By Karin Joan - Birthday Wishes

Then I removed the mask and colored the Missees with Copic markers.
The sentiment is from the same set and is stamped with Versafine Onyx Black.

Next I used a stitched rectangle die to cut out this front piece.

I adhered a stroke of patterned paper (MPPKJ01) onto the card base and then added the front panel with foam tape to create some dimension.

Missees By Karin Joan - Birthday Wishes

Missees By Karin Joan - Birthday Wishes

Missees By Karin Joan - Birthday Wishes

Missees By Karin Joan - Birthday Wishes


Supplies
- Missees STAMPKJ15
- Mixed Paper Pad (
MPPKJ01)
- Memento Tuxedo Black
- Copic markers: E15, E37, E29, N4, N5, N6, N9, Y00, Y11, Y21, Y35, E00, E11, E13, E23, BG11, BG32, BG13, B21, B45, B97, R22, R24, Y15
- Stitched rectangle die
- Versafine Onyx Black
- Foam tape

Tuesday, April 13, 2021

Rachel Vass Designs - Hugs

Hello crafty friends!

I'm popping in today to share a card I made using the Hugs digital stamp, one of the new releases from Rachel Vass Designs.
The rabbits are very cute but I chose the kangaroos because we have some wallabies in our backyard and I love them :-)

Rachel Vass Designs - Hugs

I used the print and cut function in my Silhouette Studio and colored the kangaroos with Copic markers.

I also printed the sentiment on a piece of cardstock and used a stitched rectangle die to cut it out.
I blended some Peechy Keen Lawn Fawn ink and matted this panel onto a piece of white cardstock.

Finally I stamped the Quilted Hearts Background with Manatee Lawn Fawn ink and adhered the front panel and the kangaroos with foam tape to create some dimension.

Rachel Vass Designs - Hugs

Rachel Vass Designs - Hugs

Rachel Vass Designs - Hugs


Supplies
- Rachel Vass Designs - Hugs
- Silhouette Cameo
- Copic markers: W3, W5
- Stitched rectangle die
- SSS - Quilted Hearts Background
- Lawn Fawn ink:
          - Peachy keen
          - Manatee
- Foam tape

Saturday, April 10, 2021

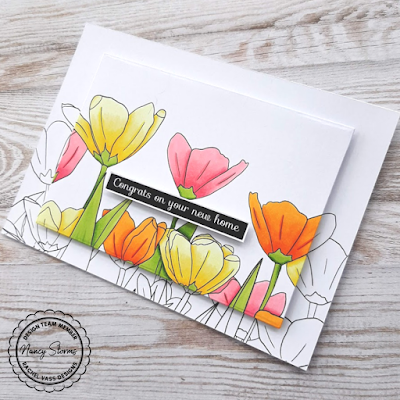
Rachel Vass Designs - Spring Delight Border

Hi all!

Today I have a card to share with you featuring the Spring Delight Border from Rachel Vass Designs.

Rachel Vass Designs - Spring Delight Border

I double printed the image and colored one of them. Then I used a rectangle die to die cut a part of it.

Next I adhered the non colored image to my card base and adhered the colored panel with foam tape to create some dimension.

Finally I printed the sentiment and also adhered it with foam tape for dimension.

Rachel Vass Designs - Spring Delight Border

Rachel Vass Designs - Spring Delight Border

Rachel Vass Designs - Spring Delight Border


Supplies
- Rachel Vass Designs - Spring Delight Border
- Copic markers: YG03, YG17, YG67, RV21, RV13, RV14, Y17, YR04, YR07, Y00, Y02, Y06, Y08
- Silhouette Cameo
- Rectange die

Friday, April 9, 2021

Birthday Butterflies

Happy Friday!

I spent some time in my craft room today and made this card base on a sketch and color challenge.

I first stamped the butterflies from Uniko and colored them with Copic markers.

Then I used the Dotted Swirls Debossing die from Altenew on a piece of craft cardstock. I also used a slimline border die from Sunny Studio to match the sketch from FMS.
The sentiment is from Mama Elephant.

Finally I adhered the pieces with foam tape to create some dimension.


I want to share my card at:

- Freshly Made Sketches #480


- Color Throwdown #637


Supplies
- Uniko - English Country Garden Butterflies
- Memento Tuxedo Black
- Copic markers: Y08, R32, YG25, YG17
- Craft cardstock
- Altenew - Dotted Swirls Debossing Cover Die
- Sunny Studio - Slimline Nature Borders
- Pink cardstock
- Mama Elephant - Occasional Labels
- Altenew Obsidian pigment ink
- Foam tape

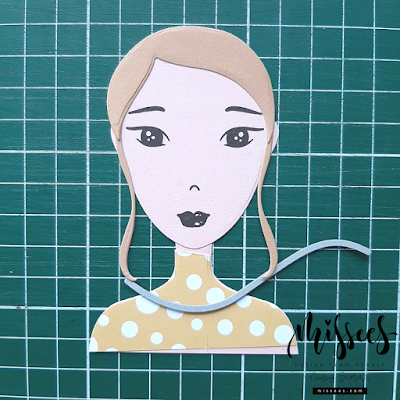
Missees By Karin Joan - Little girl with great big plans

Hi all!

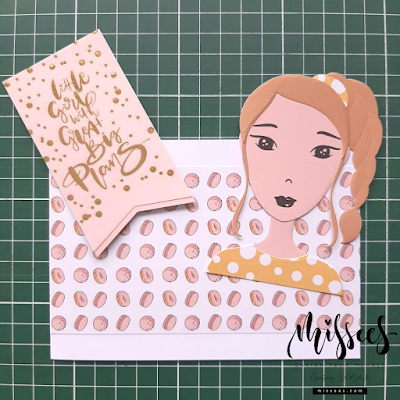
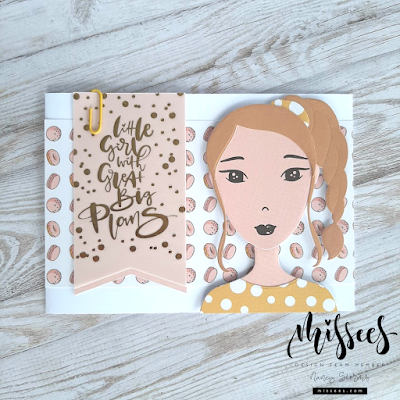
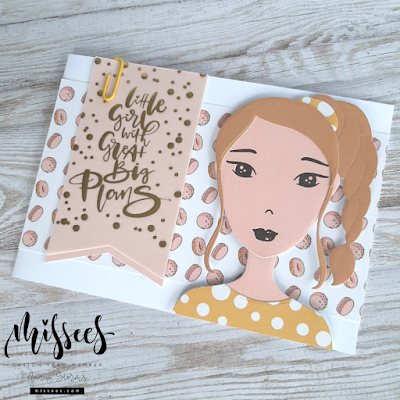
For this card I started by die cutting the head and body by using the Primarina set (BASICSDCKJ06) and paper from MPPKJ01. I also stamped the eyes, nose and mouth with Versafine Onyx Black.
I also die cut the hair and hair accessory using the same set.
The hair as wel as the clothes are from MPPKJ01.
I assembled this Missee and adhered everything together.

Missees By Karin Joan - Little girl with great big plans

Missees By Karin Joan - Little girl with great big plans

Missees By Karin Joan - Little girl with great big plans


Then I adhered the donut patterned paper from PPKJ03 to the card base and used foam tape to adhere the Missee on top of it.

The sentiment is from a vellum paper from MPPKJ01. I adhered it to a piece of pink cardstock from the same paper pad by adding some glue behind the golden dots. Then I used a yellow paper clip to add it to the card base.

Missees By Karin Joan - Little girl with great big plans

Missees By Karin Joan - Little girl with great big plans

Missees By Karin Joan - Little girl with great big plans

Missees By Karin Joan - Little girl with great big plans


Supplies
- Primarina (BASICSDCKJ06)
- Missees Paper Pad (PPKJ03)
- Mixed Paper Pad (MPPKJ01)
- Versafine Onyx Black
- Paper clip

Wednesday, April 7, 2021

Missees By Karin Joan - Hello

Hi all!

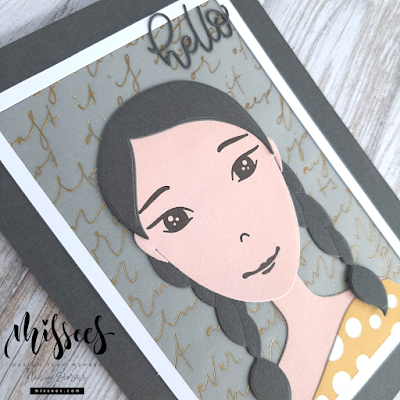
For this card I first die cut the head and body from BASICSDCKJ06. I then stamped the eyes, nose and mouth from the same set with Versafine Onyx Black.
Next I die cut the hair from black cardstock.
Her clothes were die cut from the yellow dots paper from PPKJ03.

Missees By Karin Joan - Hello
 
 
I wanted to create a frame around this Missee so I cut out this frame from white cardstock. I adhered the vellum (from MPPKJ01) at the back of it with liquid glue.
I then adhered this to my card base and added the Primarina on top of it.

The sentiment is die cut from black cardstock and is from the same set (
BASICSDCKJ06).
 

Missees By Karin Joan - Hello

Missees By Karin Joan - Hello

Missees By Karin Joan - Hello

Missees By Karin Joan - Hello

Missees By Karin Joan - Hello


Supplies
- Primarina (BASICSDCKJ06)
- Paper Pad (PPKJ03)
- Mixed Paper Pad (MPPKJ01)
- Versafine Onyx Black
- Black cardstock

Monday, April 5, 2021

AAA Birthday Challenge #24 - A Shaped Card

Hi everyone!

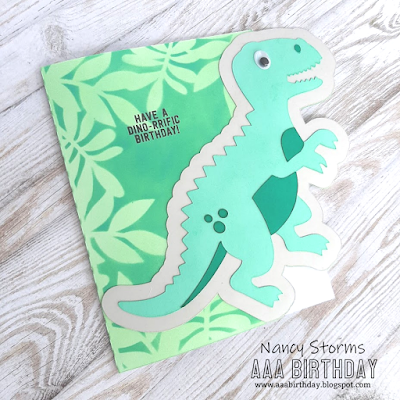
Another month, another game to play along with. This month we challenge you to create a shaped card, so let's see what you can come up with. Here's my take on this challenge.


I created this dinosaur card for a little boy.

Dinosaur shaped card

I used the dinosaur (Silhouette Design ID 135707) from the Silhouette Store and modified it slightly.
I colored the dinosaur parts with Volcano Lake and Emerald Altenew ink. For the offset of the dinosaur I used
Manatee Lawn Fawn ink. For the eye I used a googly eye as I think this would be a funny touch :-)

For the background of the card I used the Leafy Frame stencil from SSS and blended Cracked Pistachio and Lucky Clover Distress Oxide ink.

I adhered everyting and stamped the sentiment from SU with Versafine Onyx Black ink.

Dinosaur shaped card

Dinosaur shaped card


Congratulations to Trina P, our guest designer this month. Pop over to the AAA Birthday blog to see what Trina and the rest of the Design Team have designed this month.


Supplies
- Silhouette Design ID 135707
- Silhouette Studio
- Altenew ink:
          - Volcano Lake
          - Emerald
- Manatee Lawn Fawn ink
- SSS - Leafy Frame stencil
- Distress oxide ink:
          - Cracked Pistachio
          - Lucky Clover
- Versafine Onyx Black
- Su - No Bones About It
- Googly eyes

Thursday, April 1, 2021

Rachel Vass Designs - Ravishing Rose

Hi crafty friends!

I'm stopping by today to share this card using the Ravishing Rose digital stamp from Rachel Vass Designs March release. 

Rachel Vass Designs - Ravishing Rose


I first made the background by stamping the Rose Leaves background stamp from IO with Unicorn White pigment ink onto a piece of colored cardstock.

Then I printed the floral image and sentiment from the same set and colored it with Copic markers. I used a stitched square die to cut it out.

Finally I added some gold twine onto the card base and adhered the front panel with foam tape to create some dimension.

Make sure to head on over to Rachel's page for more inspiration from the rest of the talented DT.


Rachel Vass Designs - Ravishing Rose


Supplies
- Rachel Vass Designs - Ravishing Rose
- Impression Obsession - Rose Leaves
- Colored cardstock
- Hero Arts Pigment Ink Unicorn White
- Stitched square die
- Copic markers
- Twine
- Foam tape